
The first rubber stamps I made were a sort of a spur-of-the-moment project for an outreach event I was involved in this past spring (for the CSCC). They were something to interest the younger set so that we could engage their parents on the subject of watershed protection in SE Portland, and I did not do any research into how to produce a durable and reliable rubber stamp.
The first set was quite popular at the event (and at others in the summer) but they had two problems: a) they were not durable enough for continuous use outside the studio, and b) some of the the larger stamps were difficult to get a solid print out of, even when a grown-up pressed hard, both on the ink pad and the paper.
The solution to the first problem of course was to use better quality rubber. The first set was made (somewhat inadvertently) from two separate products, Speedball's Speedy-Cut rubber, and Dick Blick's Soft-Kut, both inexpensive and seemingly serviceable rubber products. They worked quite well, being easy to cut (I'm used to linoleum), and printing well with either brayer-applied ink or with an ink pad. The durability problems showed up at the end of several hours of continuous and frenetic use by several dozen school-aged children, and after transporting the stamps home stacked one on another.
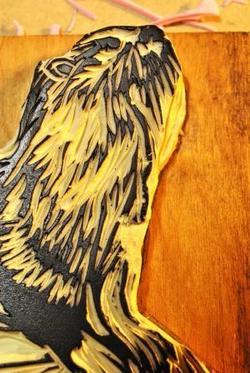
right: Damage from rough handling is visible at the edge above the ear and at edge of foreleg. Possibly this was exacerbated by the use of quick-drying alcohol-based ink. The river otter is a favorite at events.
The new rubber is another Speedball product called Easy-Carve, which is nearly as soft as the other two but not at all prone to crumbling (the Soft-Kut is particularly prone to this). Easy-Carve is pink and pliable, and seems more durable not only to me but has proven itself in the letterboxing community where it's known as "the pink stuff". It can be had for a very reasonable price at Stampeaz.com, which also has impeccable service.
The new rubber is another Speedball product called Easy-Carve, which is nearly as soft as the other two but not at all prone to crumbling (the Soft-Kut is particularly prone to this). Easy-Carve is pink and pliable, and seems more durable not only to me but has proven itself in the letterboxing community where it's known as "the pink stuff". It can be had for a very reasonable price at Stampeaz.com, which also has impeccable service.
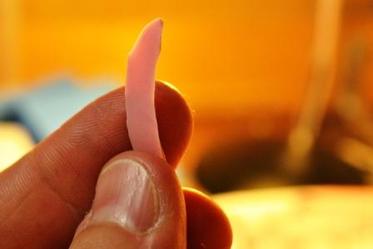
left: A sliver of Easy-Carve. Cuts like butter, seems to last like Vibram.
The second problem was caused by a slight warping of the boards that the larger stamps were mounted to, producing a dead zone which would not print properly. The new stamps have a sturdy hardwood backing and a layer of foam in between the wood and rubber in order to distribute pressure over the printing surface. The hardwood is less prone to warping and splinters than the random pieces of pine and plywood I used first, and also looks great after sanding. These details of construction were learned from the website of American letterboxer Kirby Palm, who is an eccentric of a different sort than I am, but is a creative and lucid one. He also gives good and detailed advice on things he knows about.
The second problem was caused by a slight warping of the boards that the larger stamps were mounted to, producing a dead zone which would not print properly. The new stamps have a sturdy hardwood backing and a layer of foam in between the wood and rubber in order to distribute pressure over the printing surface. The hardwood is less prone to warping and splinters than the random pieces of pine and plywood I used first, and also looks great after sanding. These details of construction were learned from the website of American letterboxer Kirby Palm, who is an eccentric of a different sort than I am, but is a creative and lucid one. He also gives good and detailed advice on things he knows about.
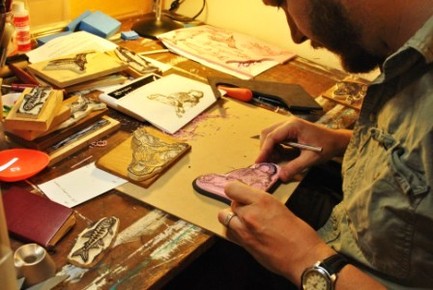
right: Placing a newly cut stamp on foam cut a little bigger than the stamp. This particular one was copied directly from the damaged one above, with a few improvements in detail and style. Old style otter stamp used a piece of plywood originally cut by my grandfather Charlie Norton for mounting a photograph, probably forty years ago. The drawing table was his as too.
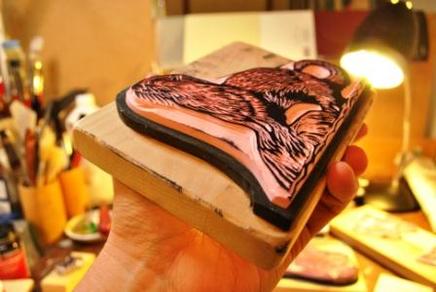
left: Completed new style stamp with foam and hardwood block. This one has been proofed by my two-year old Samara, hence the smudges.
 RSS Feed
